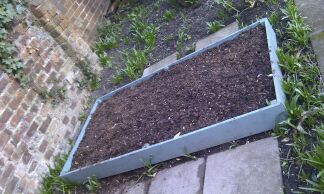
I thought it would be a good idea to keep some notes on the problems I had when first setting up the new raised vegetable beds. In general the process went fairly smoothly but there were a number of things that on reflection I might have done differently!

As you can see these are just average “low-slung” raised beds (these to be precise) that I ordered from Greenfingers.com once I’d decided to expand the amount of veg growing space in the garden.
Construction
The various parts of the flat pack kits were all painted with using the leftover bits from an old tin of wood preserving paint – maybe not the ideal solution for a more permanent setup but in my mind I’m still at the “evaluation stage” so I’ll give things a try while learning lessons along the way.
The first thing I noticed during the assembly was that the wood occasionally split when screwing the sides to the uprights. The wood is perfectly adequate quality for a raised veg bed and should last several years (maybe up to 5 perhaps?) but it would presumably last a lot longer if the construction didn’t leave splits and cracks everywhere.
Best lesson learned: Build them properly so it lasts longer!
Installing and Filling
 As I’d found no better information while researching on the web, I order in a load of compost and manure to fill up my newly created veg beds. This combination was mixed (with a bit of digging) into the original top soil plus some extra spare top soil I had elsewhere. I also added what little existing home-made compost I already had so I’m hoping that the mixture will prove productive in the end.
After regularly reading the same point being made by a number of different books I decided to place a cloche over the veg bed which will be getting the potatoes later. This was partly to help keep the frosts off the newly dug area and partly to encourage any remaining weeds to show themselves so I can get rid of them before planting.
Best lesson learned: Use covers in late winter so weeds start growing and you can get rid of them early!
Planting and results
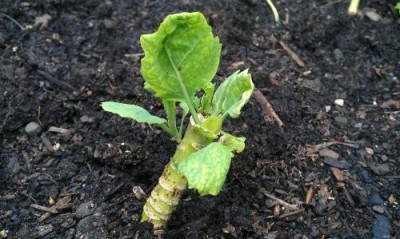
Once the first veg bed was in place late last autumn I gave in to the impatience and temptation to plant something by nipping off to B&Q to buy some cabbage seedlings. I planted them out with great expectation for the future and they were immediately set upon by something which nibbled leaves relentlessly – presumably caterpillars although I never found any. Some netting has since been added but even by February the plants were less than impressive so I’ll just have to give them time.


 As I’d found no better information while researching on the web, I order in a load of compost and manure to fill up my newly created veg beds. This combination was mixed (with a bit of digging) into the original top soil plus some extra spare top soil I had elsewhere. I also added what little existing home-made compost I already had so I’m hoping that the mixture will prove productive in the end.