As promised some time ago now, here is a post about our efforts at processing the pork from our first two weaners. The whole experience of pig keeping from start to finish was great fun but there was still so much more to learn about processing the pork when you get it home.
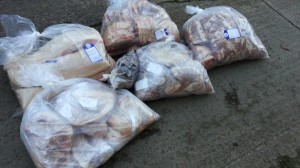
On returning from the abattoir with the many bags of vacuum packed meat, we discovered that our request to the butcher for “diced shoulder for sausage making” meant that we got all the meat for sausages in a single very large bag! This was separated into about 6-8 smaller batches of roughly 3lb per bag for freezing so that we could tackle it in stages.
Prior to this we had a brief go at sausage making and bacon curing during our smallholding day with Simon and Debbie at Hidden Valley Pigs in Devon. That was quite some time ago now so the only recent experience was a quick test run at sausage making with some shop-bought pork. We valued our own pork much more highly than this so we really didn’t want to mess it up!
So that was the first lesson in processing the meat from our pigs. When all the pork from 2 pigs arrived at once – roasts, chops, loin/belly for bacon, diced meat for sausage etc – it was very daunting but still exciting too and we made sure that we had plenty of spare freezer space ready for it
There was no way to get the whole lot cured or minced and turned into sausages in the first few days – partly through our inexperience but also because normal life goes on at the same time. In our situation it’s just not possible to drop everything and spend a week or so making sausages and bacon.
Sausage making
Right at the start the diced meat for sausages was divided into 3lb bags for freezing so that we could tackle the task in stages. It’s simple enough to take out one or two of these bags the day before making another batch of sausages.
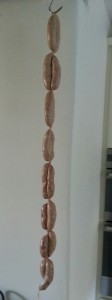
After mixing in the rusk, flavourings and water according to the recipe it works out that about two-thirds of the resulting mixture makes at least 16 chunky sausages (depending on the operators skill).
The remaining third of the mixture can be used for something else like scotch eggs, pork pies or simply as the basis for a pork burger in a quick fry-up!
All of our supplies for sausage making were ordered online from Weschenfelders and their website also has plenty of useful information on the subject too! Their “starter pack” for sausage making was definitely a good starting point and came with a copy of The Sausage Book by Paul Peacock.
The basic steps I used are as follows
- Mince the diced pork using the preferred mincing plate size
- Add the seasoning, rusk/breadcrumbs and water according to the chosen recipe
- Switch to the larger “sausage” plate and chosen sausage nozzle size (and remove the mincer knife blade)
- Put the prepared casings over the nozzle (leaving about an inch hanging over)
- Put the sausage meat back through the machine to fill the casings
There was no specific recipe but instead I came up with a general approach based on the information in the sausage book, some on-line resources and the information from Weschenfelders website. This allows for more flexibility when trying variations but the general idea is this:
- 75% meat/fat
- 7.5% rusk
- 15% water
- 2.5% seasoning
Alternatively, when working with a given weight of meat it might be easier to use the following percentages as a guide for the remaining ingredients:
- Rusk – 10%
- Water – 20%
- Seasoning – 3%
In future there will be occasional variations to this, particularly when trying new seasoning flavours to find the ideal combination to suit our preferences.
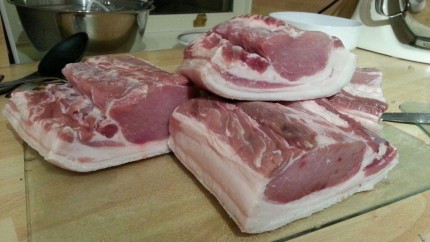
Bacon curing
This seemed a very daunting prospect before our first attempt but in reality like any recipe it’s not difficult if you follow the instructions. Once you get the hang of basic bacon curing and understand which parts are crucial for food hygiene, you can introduce variations to suit your preferences.
- Weigh the cut of meat – vital to get the best results
- Apply the right amount of cure mix for the weight (we used Supracure but added sugar sometimes as well)
- Store in a cool place (some Tupperware in a spare fridge in our case)
- Check every day and drain off any liquid each day (if there is any)
- After 5-7 days wash off the remaining cure and pat dry
- Hang up for a day or two to dry (back in the spare fridge on a meat hook)
- Cut into bacon slices of chosen thickness (pop into the freezer for an hour to make this easier)
- Bag up into suitable quantities for freezing (if required)
During our first few attempts we tried a number of variations by adding different sugars to the curing mix – granulated white sugar, soft brown sugar and golden caster sugar. If I’m honest I can’t say there was a great deal of difference in the taste but we didn’t ever do a direct comparison between all of them.
One approach that we didn’t try this time but definitely will in future is to smoke the bacon after curing – it’s an intriguing idea but we have no equipment for that at the moment so I’d either have to buy a smoker or (more likely) make something up from whatever is to hand around the place.