It didn’t take long after moving in for us to realise that having such a large expanse of lawn would be far too time-consuming every week even with the industrial grade petrol mower we bought. We could have just bought a ride-on mower and tackled the problem in that way but I preferred an alternate approach particularly as we had no need for so much lawn.
My approach was that if the grass takes too long to cut and we don’t use that area anyway then it makes sense to use that space for extra vegetable growing space. This is especially relevant as I had very quickly filled up the existing vegetable bed soon after we moved here!
General plan
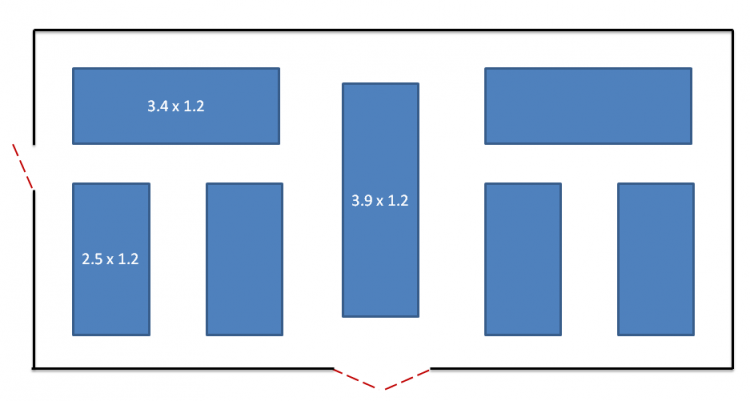
After considering some different layouts and even briefly considering the idea of a parterre with fancy box hedging, I soon realised that this would involve almost as much work as the lawn which defeated some of the object! In the end I decided to be more practical and common sense prevailed – the final layout I devised was this:
Materials so far
Some lengths of 6″ x 2″ timber from the local timber merchants
Some 2 ft long, 2″ x 2″ corner posts to hold the beds together.
Unwanted cardboard boxes left over from the move
A few “dumpy” bags of compost (but I won’t recommend buy that again due to the poor quality)
Progress so far
This was never going to be a rush project as I only expected to use these for the first time next spring. However by the time I had some of them in place and filled with compost/soil it seemed a shame to waste the growing space.
The initial layout was an exercise in careful measuring and placing stakes. A layer of cardboard covered with grass cuttings and compost hopefully kills off the existing growth and acts as a good mulch base. This allowed me to visualise some of the layout before cutting any boards to length incase I decided the sizes weren’t working for me.
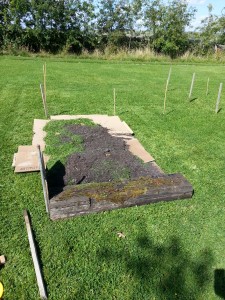
At first this didn’t look too promising to my untrained eye but after adding the boards around the edges including some old sleepers from elsewhere in the garden the first few came together quite nicely.
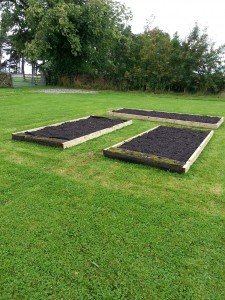
A Work In Progress
There are now 4 of the 7 raised beds in place and I couldn’t resist the temptation to plant something.
I’ve not used green manure before so I planted two beds with different varieties to try that out. Also a late sowing of carrots, onions and beetroot seemed like a good idea at the time but the weather has since become a lot more autumnal so I don’t expect much from that.
While waiting to see what if anything will germinate, I covered half of that bed with a clear plastic tunnel and the other half with some bubble wrap. It would have been interesting to see if there was a difference in the results between the two materials.
Unfortunately after I removed the covering temporarily on a day when the weather had picked up a bit, the chickens discovered the joys of scratching and dust bathing in the loose soil when I wasn’t looking.
I don’t expect much to survive now other than the few rows which I covered over again with the plastic cloche but you never know! The green manure may never recover but I can always try that next year.
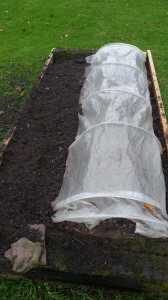
Luckily I learnt my lesson from this episode and the next batch of sowing – garlic and overwintering onion sets – were planted last weekend behind a temporary 4 ft high fence
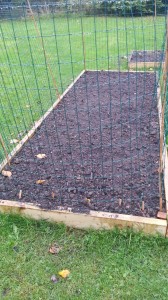
Some hard lessons learned but once I get the rest of the raised beds finished with luck all this effort will pay off in the spring when I can get much more in the ground that I did this year!
If you can get spent mushroom compost it would be great for your raised beds, we get it free here in Ireland. We use second hand scaffold boards to make our beds, 8 ft long about 1.5 inches thick 9 inches wide, we treat with wood preservative , they are only 4 euros each around £3.20 and should last for years, try scrap yards or builders merchants or building companies.