According to the BBC Weather page for our area this morning, it looks like we may be getting the first sub-zero temperatures at night this coming weekend! We’ve particularly enjoyed watching the onset of autumn with the associated array of colours but we can’t ignore this sign that winter is coming.
First frost perhaps?
Even after 5 months, we still find ourselves caught up in the excitement of finally completing the purchase and move to our new property. I’m sure this will fade with time but I’d like to remember the feeling for as long as possible so that we appreciate our good fortune (and hard work).
I’m still making a conscious effort to update the blog or keep taking notes for future reference though because, with so many new experiences in such a short space of time, there is no way I will be able to remember everything from one year to the next!
We’ve already sorted out the most important winter preparations – coal delivered, wood delivered and stacked, oil tank filled etc. – but even these fairly basic tasks were all new to us. We’re only used to the mains gas supply that we had in our previous, suburban house with no need to ensure that we have enough supplies in stock. One remaining task is to ensure that the spring water supply is properly protected to prevent it freezing if we get a really cold spell.
There are still so many first time experiences to come and a great many unknowns ahead of us but that is all part of the adventure. One thing is almost certain though – I’m sure we will find ourselves regretting the recent enthusiasm for the coming winter by the time the cold North Pennine weather really sets in.
As we get closer to their departure it’s a good idea to keep track of their progress more closely. We may not be able to change much this time around but it should be useful reference information for the future.
The 24 week weigh-in
The usual calculation has been repeated but this time I took measurements a number of the times over the weekend to give an average figure.
Twirly
Heart Girth (measuring around the body just behind the front legs) = 0.89 m
Length (measured from between the ears to the base of the tail) = 0.97 m
This means that the approximate weight is: (0.89 ² x 0.97 x 69.3) = 53.25 kg
No Tail
Heart Girth (measuring around the body just behind the front legs) = 0.94 m
Length (measured from between the ears to the base of the tail) = 1.03 m
This means that the approximate weight is: (0.94 ² x 1.03 x 69.3) = 63.07 kg
Conclusion
It seems that No Tail is still growing faster than Twirly despite living in the same environment and being fed twice a day with the same feed. We were told that they are not directly related, at best cousins, so there might be some difference resulting from the family tree perhaps.
With just 5 weeks to go, the reality of the situation is becoming all too clear. There are many things to get organised in advance but at least the abattoir is booked. Next on our list of jobs is picking up our shiny new trailer (hopefully in a week or two) and preparing the cutting list for the butcher.
We plan to try making our own sausages and curing bacon but the rest is headed straight for the freezer with a roasting joint top of the list for the oven!
While constructing the new improved facilities on Chicken Lane, it seemed to be a fairly simple task to give them some additional shelter by moving a rusty old pig ark from an adjacent field. How hard could it be I thought?
The answer is – very hard! – especially when there are just two people and they’re not entirely sure what they are doing.
Luckily the old ark was already upside down under a large sycamore so, after clearing out the debris from years of neglect, it still proved to be too heavy for two people to lift over the stock fencing.
No problem I thought, bring out the quad bike and drag it round through the gate. The quad is acting up a little but it eventually started (must get that starter/battery fixed!). We quickly managed to drag the ark out of the field behind the quad and made it two-thirds of the way before we reached a narrower point in the path.
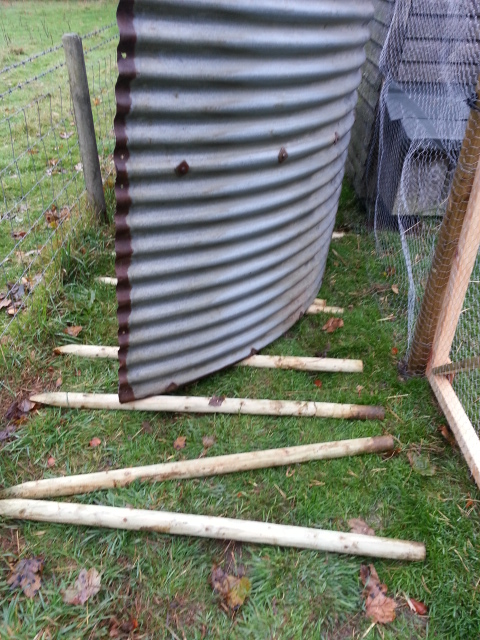
Fence post rollers
From here it wouldn’t have been wise to drag using the quad without risking damage to either the stock fencing or the main chicken house.
We would have to resort to pushing/pulling but that didn’t look promising with our limited combined strength and the restricted space to work in.
Luckily a flash of inspiration struck at this point and I finally found a use for the useless facts from school about the Egyptians building the pyramids.
Our spare fencing posts would make great rollers and the ark could be simply rolled up the hill into place.
This would make everything easier to handle and with luck would reduce the risk of any further damage to the rusty hulk as a result of our manhandling.
Not quite as simple as described but was still a huge success and the move was completed with no further problems! We can now put chicken feed under cover through the winter and it gives the chickens somewhere to shelter from the elements if needed.
Once the ark was in place we were able to complete the remaining fencing work so that we could have a greater element of control over their coming and going!
It has been quite frustrating for us having to spend so much time finding out where the hens go to lay their eggs – for some reason it isn’t often in the nest boxes that are provided.
On the first occasion when we found a hen sitting on some eggs in the woods, we were quite interested to see what would happen. We didn’t know what the previous owners used to do in that situation so we just left her to it and watched over her from afar.
In retrospect perhaps this decision was the start of our problems but since that time two more hens have hatched some chicks – one batch of 5 and one batch of 7.
No eggs in the nest box
No amount of regular cleaning, dusting with red mite powder, fresh straw and even the use of china fake eggs seems to make much difference. Most of the hens are just not interested in those nest boxes although we do occasionally get a token egg or two.
I’m starting to wonder whether our hens can hold their eggs in until we aren’t looking before popping them all out in one go somewhere in the woods as soon as one of them decides to sit on a batch.
For the moment we are getting relatively few eggs with no idea why but we are able to check them all in at night so at least none of them are sneaking off to a hidden clutch of eggs somewhere else!
The current dilemma
Mother and 7 growing chicks
It was entertaining the first few times to follow the development from hens sitting on eggs through to hatching.
It’s one thing understanding what will happen but quite another thing when you actually see it unfold before you.
After that the big surprise was the speed at which the new chicks grow. It doesn’t take that long before you have difficulty telling the chicks from the grown ups!
However eventually it slowly dawned on me that there are two inevitable outcomes for us once the chicks have all hatched and grown:
There will be a lot more chickens in need of housing
At least 50% of the new chickens will be male
The first problem is relatively easily solved while we still have a little money left in the bank. As a treat for us and the chickens, we splashed out on a new chicken house from Steve Fisher Woodworking who are just down in North Yorkshire.
After some initial concerns over damage on arrival and an error during manufacture which stumped me for a while, some excellent customer support (and prompt delivery of replacements meant that the assembly was soon completed. Just in time in my opinion as the newer chicks were growing fast and the existing housing was starting to bulge at the seams!
Chicken Lane – almost complete
I am also hoping that providing a shiny new house with brand new nest boxes will help the hens see the error of their ways and they will start leaving their eggs in the preferred location.
Introducing a fence round their housing is another trial to see if we can encourage egg laying in the nest boxes by containing them for the first part of each day. It’s worth a try and putting it up was relatively easy given that we’re only trying to keep them in for a few hours. It must be much harder putting up something strong enough to deal with a more serious problem like keeping out predators!
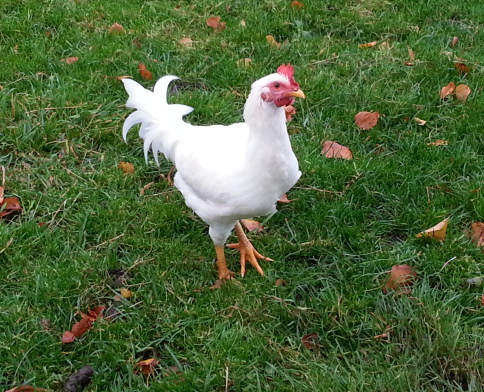
The second problem with the excess of male chickens is still not completely resolved but there are two obvious solutions. We can either find new homes for the unwanted cockerels or learn a new skill – how to “dispatch” a chicken.
It seems that re-homing them is not a simple task because there are always lots of spare cockerels and it many cases you can’t even give them away.
This means that we’re left with the difficult but necessary task of dispatching and processing our unwanted cockerels – something I’ve not done before but it’s all part of the experience I suppose.
I’m off now to build up some badly needed will power before I do the deed – luckily the two chicks that hatched from the first batch turned out to be one male and one female so I have my first “volunteer” at some point near the end of October or early November!
A few more weeks further down the line and it’s time for yet another Pig check point!
The 22 week weigh-in
The same calculation will be repeated but after the slightly surprising result last time it is becoming more obvious that one pig is noticeably heavier than the other.
Twirly
Heart Girth (measuring around the body just behind the front legs) = 0.85 m
Length (measured from between the ears to the base of the tail) = 0.95 m
This means that the approximate weight is: (0.86 ² x 0.95 x 69.3) = 48.7 kg
No Tail
Heart Girth (measuring around the body just behind the front legs) = 0.9m
Length (measured from between the ears to the base of the tail) = 1.0 m
This means that the approximate weight is: (0.9 ² x 1.0 x 69.3) = 56.1 kg
Conclusion
As time goes by I can feel that, despite my best efforts, there is a definite sense of attachment growing. However I’m doing my best to get past that and there will be no change to our original rule that the pigs are only here until November. Besides we’ve already ordered our shiny new livestock trailer so we can take them to the abattoir – which reminds me, that needs to be booked in advance so I mustn’t forget to do that.
The gap between the two is now clearly noticeable when you see them together but they get fed at the same time and there are no obvious signs of bullying while they eat? Perhaps the one with a tail is just less efficient when it comes to rooting out extra food while foraging in their woods?
We will no doubt need to keep an eye on this and possibly adjust the feeding level for the final couple of months to avoid the larger one putting on any extra weight. Hopefully it won’t matter too much if they are slightly different weights but I’d definitely rather not have one too fat and one too thin!
It didn’t take long after moving in for us to realise that having such a large expanse of lawn would be far too time-consuming every week even with the industrial grade petrol mower we bought. We could have just bought a ride-on mower and tackled the problem in that way but I preferred an alternate approach particularly as we had no need for so much lawn.
My approach was that if the grass takes too long to cut and we don’t use that area anyway then it makes sense to use that space for extra vegetable growing space. This is especially relevant as I had very quickly filled up the existing vegetable bed soon after we moved here!
General plan
After considering some different layouts and even briefly considering the idea of a parterre with fancy box hedging, I soon realised that this would involve almost as much work as the lawn which defeated some of the object! In the end I decided to be more practical and common sense prevailed – the final layout I devised was this:
Final veg bed layout
Materials so far
Some lengths of 6″ x 2″ timber from the local timber merchants
Some 2 ft long, 2″ x 2″ corner posts to hold the beds together.
Unwanted cardboard boxes left over from the move
A few “dumpy” bags of compost (but I won’t recommend buy that again due to the poor quality)
Progress so far
This was never going to be a rush project as I only expected to use these for the first time next spring. However by the time I had some of them in place and filled with compost/soil it seemed a shame to waste the growing space.
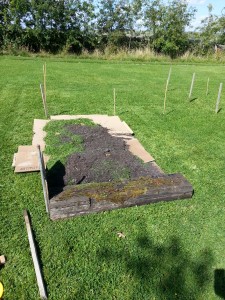
The initial layout was an exercise in careful measuring and placing stakes. A layer of cardboard covered with grass cuttings and compost hopefully kills off the existing growth and acts as a good mulch base. This allowed me to visualise some of the layout before cutting any boards to length incase I decided the sizes weren’t working for me.
Step 1 – Cardboard, grass cuttings and compost
At first this didn’t look too promising to my untrained eye but after adding the boards around the edges including some old sleepers from elsewhere in the garden the first few came together quite nicely.
Step 2 – Edge boards and top soil
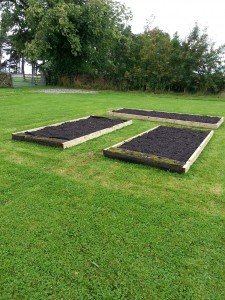
A Work In Progress
There are now 4 of the 7 raised beds in place and I couldn’t resist the temptation to plant something.
I’ve not used green manure before so I planted two beds with different varieties to try that out. Also a late sowing of carrots, onions and beetroot seemed like a good idea at the time but the weather has since become a lot more autumnal so I don’t expect much from that.
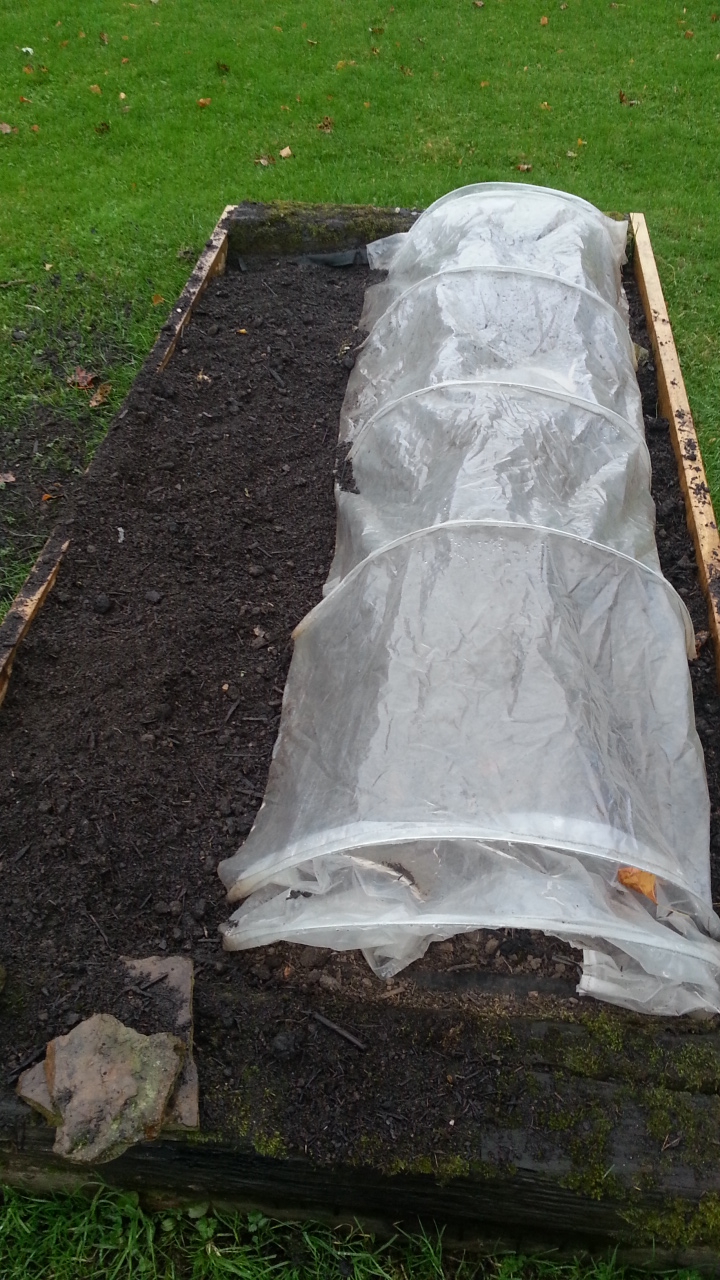
While waiting to see what if anything will germinate, I covered half of that bed with a clear plastic tunnel and the other half with some bubble wrap. It would have been interesting to see if there was a difference in the results between the two materials.
Unfortunately after I removed the covering temporarily on a day when the weather had picked up a bit, the chickens discovered the joys of scratching and dust bathing in the loose soil when I wasn’t looking.
I don’t expect much to survive now other than the few rows which I covered over again with the plastic cloche but you never know! The green manure may never recover but I can always try that next year.
Partially protected carrots, onions, beetroot
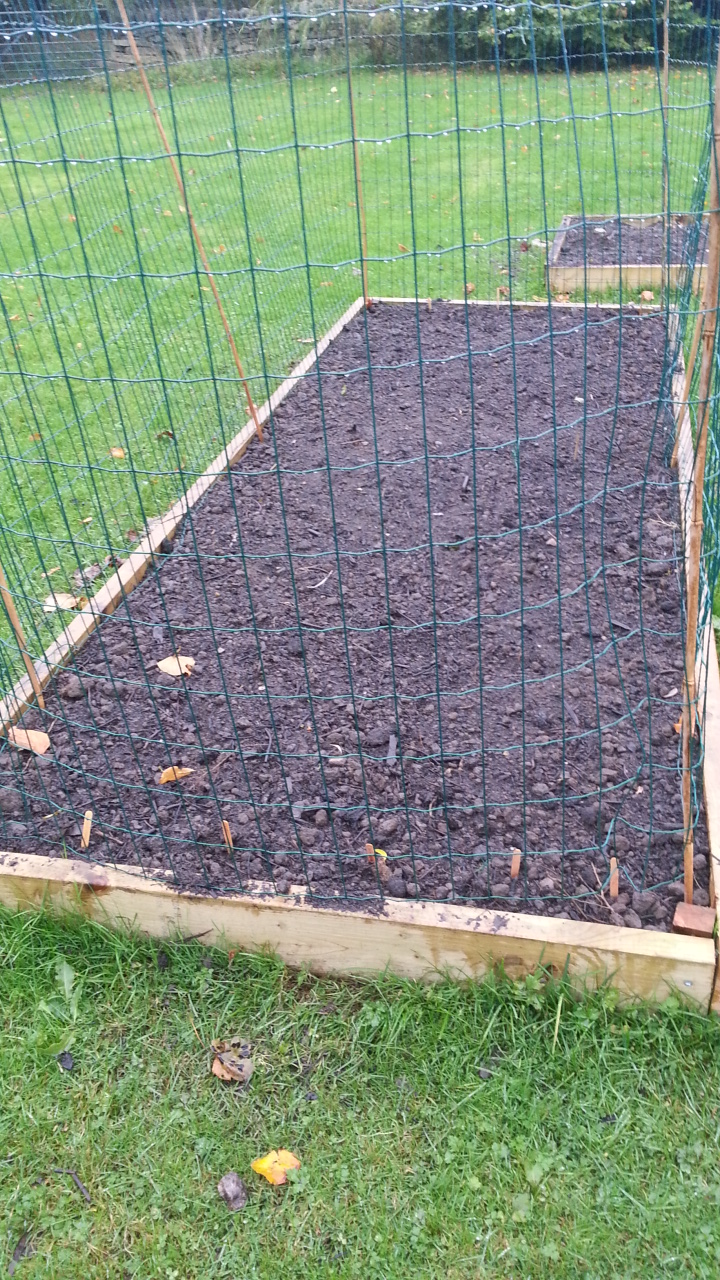
Luckily I learnt my lesson from this episode and the next batch of sowing – garlic and overwintering onion sets – were planted last weekend behind a temporary 4 ft high fence
Garlic and onion behind a security fence
Some hard lessons learned but once I get the rest of the raised beds finished with luck all this effort will pay off in the spring when I can get much more in the ground that I did this year!