The first batch of leeks and carrots are in!

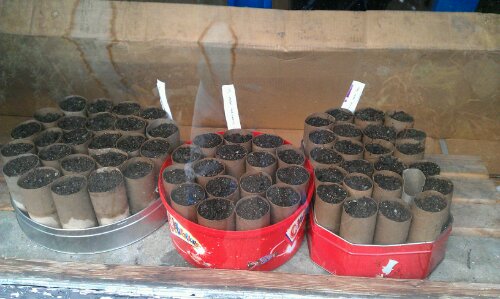
Just to prove that the toilet roll tubes worked well, here are a couple of pictures showing last weekends seed sowing. I have to confess that carrots weren’t originally on my list to grow but then I read somewhere about planting quick-growing crops in with the slower growing ones.

As a result I have batches of leeks (Apollo F1)  and carrots (Nantes Early?) planted and already on the garage windowsill. The  toilet roll tubes look like they are working well so far too which is nice!

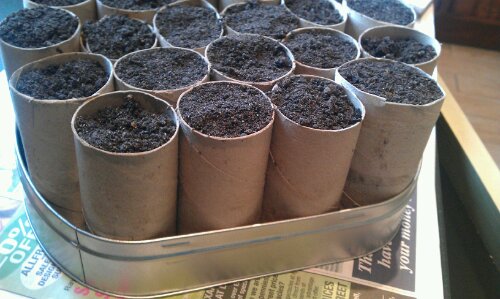
Seeds in toilet roll tubes and biscuit tin


In total I have about 80 toilet roll tubes which I filled using  a 20 litre bag of John Innes No 1 and that is about evenly split with 40 of leeks and 40 of carrots.

A range of seeds planted and labelled


Update on the raised beds

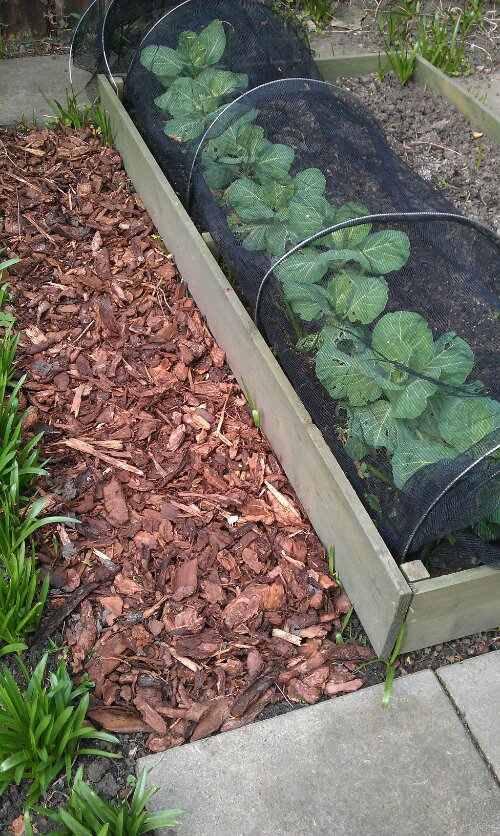
Raised veg bed with cabbages

Here are a couple of quick pictures as an update on the raised beds I added over the winter. To my inexperienced eye they look pretty impressive but then what do I know! 🙂
Last autumn I planted a few cabbage seedlings out (an impulse buy at B&Q) but they haven’t done a lot so far… At least the wood chip path along one side is looking nice and the bluebells which are everywhere should add a nice bit of colour eventually.

The other raised bed just next door is also looking good and when I took this picture the plan was to keep it covered for a while to keep it protected from any cold weather. I soon realised that the forecast is looking good for this week so I might as well leave it uncovered and get some rain on it!

Covered raised veg bed

The weekend beckons and the garden is calling…

I have big plans for activity on the vegetable growing this weekend so there should be much progress to report next week. For the moment I have posted a page of advice on growing potatoes which contains most of the knowledge I have gathered from various websites, blogs and vegetable growing books.

This  will be updated with any additional potato advice that I find and also with further details of my own experiences with growing Charlotte potatoes in a new vegetable bed I’ve started using.

With luck I should be able to plant a lot of my leek seeds in my home-made seed trays using cardboard tubes from toilet rolls. I may even experiment a little bit by filling them with different types of compost.

I also hope to fix my wheelbarrow which has had a flat tyre for ages and my initial attempts at repairs last year using a new inner tube were less than successful. I may end up cutting my losses though and just buy a new one – I can always place  the old barrow at the end of the garden and use it as a new raised bed


Setting up new vegetable beds

I thought it would be a good idea to keep some notes on the problems I had when first setting up the new raised vegetable beds. In general the process went fairly smoothly but there were a number of things that on reflection I might have done differently!
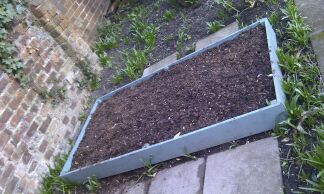
image

As you can see these are just average “low-slung” raised beds (these to be precise) that I ordered from Greenfingers.com once I’d decided to expand the amount of veg growing space in the garden.

Construction

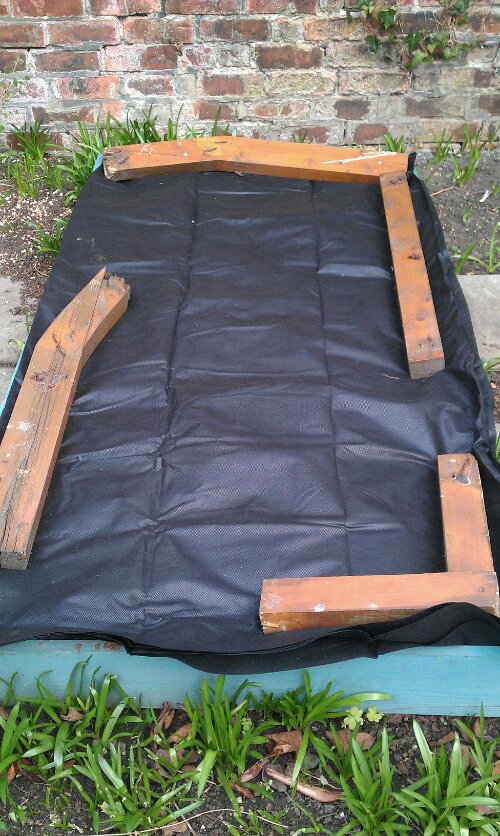
The various parts of the flat pack kits were all painted with using the leftover bits from an old tin of wood preserving paint – maybe not the ideal solution for a more permanent setup but in my mind I’m still at the “evaluation stage” so I’ll give things a try while learning lessons along the way.

The first thing I noticed during the assembly was that the wood occasionally split when screwing the sides to the uprights.  The wood is perfectly adequate quality for a raised veg bed and should last several years (maybe up to 5 perhaps?)  but it would presumably last a lot longer if the construction didn’t leave splits and cracks everywhere.

Best lesson learned:  Build them properly so it lasts longer!

Installing and Filling

imageAs I’d found no better information while researching on the web, I order in a load of compost and manure to fill up my newly created veg beds. This combination was mixed  (with a bit of digging) into  the original top soil plus some extra spare top soil I had elsewhere. I also added what little existing home-made compost I already had so I’m hoping that the mixture will prove productive in the end.

After regularly reading the same point being made by a number of different books I decided to place a cloche over the veg bed which will be getting the potatoes later. This was partly to help keep the frosts off the newly dug area and partly to  encourage any remaining weeds to show themselves so I can get rid of them before planting.

Best lesson learned:  Use covers  in late winter so  weeds start growing and  you can get rid of them early!

Planting and results

Once the first veg bed was in place late last autumn I gave in to the impatience and temptation to plant something by nipping off to B&Q to buy some cabbage seedlings. I planted them out with great expectation for the future and they were immediately set upon by something which nibbled leaves relentlessly – presumably caterpillars although I never found any.  Some netting has since been added but even by February the plants were less than impressive so I’ll just have to give them time.
 

Chitting update

image
Little or no progress with chitting my seed potatoes

Currently there still seems to be very few signs of action on the chitting front which is a little disheartening but not entirely unexpected I suppose. I wish I could remember some details of the previous (and first) time I grew potatoes but that was some years ago and my memory isn’t what it used to be… I think!

This looks like a fairly respectable seed potato but it just doesn’t have any signs of activity yet. They have only been chitting for 2 weeks now so I can only assume the problem is with my impatience and not some bigger problem with the seed potatoes.

Of course the chiting arrangements in my garage (some egg boxes not too near the windows) might not be the best setup but I’m sure they worked well last time around which was a few years ago now.

Next weekend I had planned to start a second batch of seed potatoes on the chitting process so it would be nice to see some signs of activity by then.

Planting the leek seeds

These are not mine obviously!

The leek seeds (Apollo) arrived from Marshalls Seeds as part of the initial delivery in January along with the seed potatoes and some Growmore so I’ve been impatient to get them planted ever since.

Unfortunately as I don’t have a proper greenhouse and the weather up here in the North East of England can be slow to warm up, I plan to use the garage windowsills  so I don’t want to start too early. Luckily this is also delayed by the fact that work keeps me busy and away from the garden so I can’t get to these until next weekend I think.

Staggered Planting

Another favourite subject of mine this year is staggering the planting time so I’ll be doing the leek seeds in two batches spaced at least 3-4 weeks apart. It may not make much difference with  leeks in the long run as they  stay in the ground for quite some time but at least it spreads out the enjoyment of planting the seeds!

Seeds in a roll

I’m not sure where I got the original idea from but after deciding to expand the veg beds late last year, I thought  it would be a good idea to save the cardboard tubes from the middle of the toilet rolls for use in the garden.

I’m amazed how many I managed to save between December and February but there are absolutely loads even though as far as I can recall we didn’t have an outbreak of dysentery in the period.

How will it work?

My theory was two-fold and goes something like this:

  1. I can fill the cardboard tubes with seed compost and stack them all together in an old chocolate tin left over from Christmas with drainage holes. They can start off indoors like this and just  plant them out in the tubes  at the right time to minimise root disturbance – the  tube will eventually rot away.
  2. I can also use the cardboard tubes as an aid when “blanching the leeks as they develop. I thought, why not just slip another roll (or half roll) over each growing plant so that I can  build up the earth around the plant with less risk of getting soil in amongst the leaves.

However after reading about an experience of  mould appearing on cardboard/paper based seed starters I’m starting to have small doubts. Presumably this can be prevented with good drainage and proper ventilation but I’ll be keeping my eyes out for this in the future.

Wood chip is the way forward

I can’t believe I’ve never used wood/bark chips in the garden before! After setting up the 3 veg beds it very quickly became clear that I didn’t have enough old paving slabs to reuse when making the paths around them.

My first reaction was to leave the unpaved areas as compressed soil and hope that regular use would mean that weeds did not take over. It wasn’t long before I realised that wasn’t going to work as a permanent solution for weed suppression.

Instead I added 3 bags of bark chips to a recent online order of compost (from Creative Garden Ideas) and threw a couple of them down (after clearing any obvious weeds of course). The result was a major transformation quite out of proportion to the amount of time and effort I had put in.

There was an added bonus as a result of using pine bark chips, my veg beds now small a little like a pine fresh toilet!

High street vs Online

I saw a few great books in a bookshop recently and almost bought this one in particular but a small voice told me to hold off and check on the web. I didn’t need the book immediately and you always seem to get a better price on the web.

Practical Self Sufficiency by Dick and James Strawbridge

Sure enough as soon as I got home, I checked on Amazon and found that the same book was available for only £12.70 (plus p+p) instead of the £20 that the high street bookshop wanted from me!

You do the maths but it’s clear why the high street chains are suffering especially given the great service I’ve always found from Amazon. Needless to say I will be buying this book online later this year and certainly making use of the associated Practical Self Sufficiency website.

Chickens are something for the future… I think!

There are very rough plans for chickens in the future but probably not at the present house. Many people know someone who has kept chickens in a suburban garden and I’m no different but it’s obviously a very different story when they are your chickens in your garden!

After the initial nosing around the web, I think that this seems a fairly practical option for starting out with and it looks nice too which is a bonus I reckon

Midi Dell chicken house and run (by Smiths Sectional Buildings)

There is a raised living area to give shelter underneath the house and to deter vermin problems. Some carrying handles run throughout the building to enable easy mobility and they also double up as daytime perches for the chickens. There is a solid wooden floor in the house area with loose perches that lift out for easy cleaning the ark. The nest boxes protrude from the rear of the ark and the back board hinges down for external egg collection. There is access to the chicken run from a large wire door and access to the ark through a lift off side panel.

What more could they want apart from regular food, proper care and attention plus a guarantee that there will be no foxes sniffing around?

The current plan is probably to move house at some point in the next few years to get somewhere with a larger garden. As a result we could have any chicken house/run in a specific spot most of the time but allow the birds out when possible and still move the run occasionally to give them a change of scene. 

In general this makes sense to me at the moment but of course I’ve never raised chickens before (or any kind of productive livestock) so I could be completely wrong. There’s only one way to find out though – give it a go!